


Hey there! In this article, I will be discussing React Router in React.js
React is a JavaScript library for building user interfaces and used for SPA(Single Page Applications). In as much as it is used for SPA, there should be a way to navigate through the application. This is where React Router comes into the picture
Note: We won’t be discussing React or JavaScript in general. Good knowledge of ReactJS and JavaScript will come in handy as you go through this article.
What is React Router?
From the reactrouter.com website, React Router is a collection of navigational components that compose declaratively with your application. React-Router is simply a tool for navigating through a react app. Components are rendered depending on the route the user navigates. So, let's get started
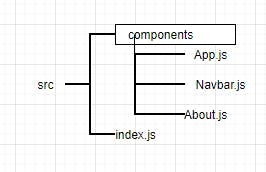
You must have created your React app at this point and I will be using the named files in the src folder on the image as cases for explanations
Installation
To get the react-router working in your application, you install it by running this command. Then, wait till all dependencies have been installed
npm install react-router-dom
So, how do we use it?
Now that it's been installed into the project, to make use of it, import it into our App.js component.
import {BrowserRouter as Router, Switch, Route} from ‘react-router-dom’
Currently, we are importing three things from the react-router-dom.
BrowserRouter as Router: This will wrap everything in the return statement of the component(App.js) which shows that we will be making use of routes in the application.
Switch: Switch is used to make sure that each route is exact.
Route is used as tags to include path for the routes and component to be rendered
Import the About component in the components folder into the App.js file. The syntax will look like this:
<Router>
   <Switch>
        <Route path='/about' component={About} />
   </Switch>
</Router>
NavBar Component
Here, we are to create a navigation menu with links pointing to the different areas of the application. Import the Link from the react-router-dom for the navigation.
import { Link } from "react-router-dom";
We use Link as tags to wrap the nav elements. It goes with the "to" attribute to specify the route to follow. An example is shown below
<Link to=”/about”>
    <li>About Page</li>
</Link>
Import the Navbar component inside the App.js and call it just above the Switch tag
Check out the demo I made below
References
React Router allows us to build Single Page Applications with navigations without refreshing the browser. To read up more on react-router, you can visit
Thanks for reading till the end, If you like the article, do shower your love in the comments😍. You can also connect with me on twitter.